Garlic is a staple in many kitchens, loved for its robust flavor and versatility. But have you ever considered the transformation that happens when you roast garlic? Roasting garlic in a garlic roaster intensifies its sweetness and softens its pungency, creating a mellow, aromatic ingredient that can elevate any dish. This article will walk you through the benefits of using a garlic roaster, provide a step-by-step guide for perfect roasting, and share tips on how to incorporate roasted garlic into your meals.
When you roast garlic in a garlic roaster, you’re not just cooking the garlic; you’re unlocking a world of flavor. Whether you’re an experienced chef or a beginner, knowing how to properly roast garlic can turn ordinary dishes into extraordinary ones.
What is a Garlic Roaster and Why Should You Use One?
A garlic roaster is a specialized cooking tool designed to evenly roast garlic, bringing out its natural sweetness. These roasters are typically made of terra cotta, ceramic, or metal, and they help ensure that the garlic roasts evenly without burning or drying out.
Benefits of Using a Garlic Roaster:
-
Even Heat Distribution: A garlic roaster ensures that heat is evenly applied to the garlic, which helps avoid the common problem of undercooking or overcooking.
-
Enhanced Flavor: The roaster locks in moisture, which results in garlic that’s perfectly soft, sweet, and ready to be used in a variety of dishes.
-
Ease of Use: Unlike wrapping garlic in foil or using a baking sheet, a garlic roaster simplifies the process, making it easier for you to get the perfect roast every time.
Using a garlic roaster also gives you the ability to roast multiple bulbs of garlic at once, making it ideal for those who love to cook in bulk or want to use roasted garlic in several recipes.
How to Roast Garlic in a Garlic Roaster
Roasting garlic in a garlic roaster is simple, and with the right technique, you can achieve the perfect roast every time. Follow these steps to master the process:
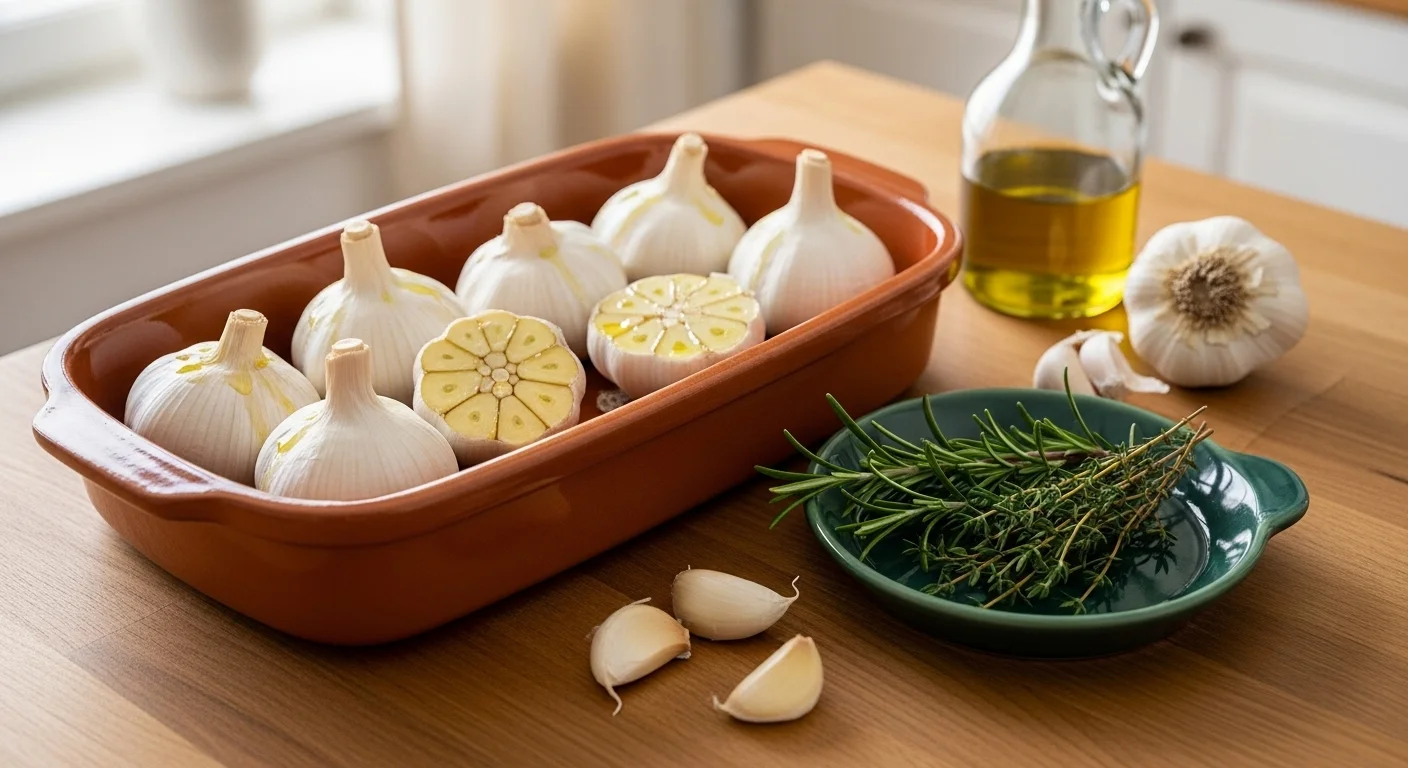
Step 1: Prepare the Garlic
Start by selecting fresh, firm garlic bulbs. Trim the tops of the garlic bulbs to expose the cloves inside. You don’t need to peel the garlic; just remove the outer layers of papery skin.
Step 2: Add Olive Oil and Seasoning
Drizzle a bit of olive oil over the exposed garlic cloves, allowing the oil to soak into them. You can also add a pinch of salt or your favorite herbs, like rosemary or thyme, for added flavor.
Step 3: Place the Garlic in the Roaster
Place the prepared garlic bulbs in the garlic roaster. Arrange them so they are snug but not overcrowded. This allows for even roasting.
Step 4: Roast the Garlic
Preheat your oven to 400°F (200°C) and place the garlic roaster in the oven. Roast the garlic for about 30-40 minutes. You’ll know it’s done when the cloves are soft and golden brown. You can also check by pressing on the garlic—if it’s soft to the touch, it’s ready.
Step 5: Enjoy Your Roasted Garlic
Once roasted, let the garlic cool slightly before squeezing the soft cloves out of their skins. Use the roasted garlic in a variety of dishes, from pasta and soups to spreads and dips.

By roasting garlic in a garlic roaster, you ensure the garlic comes out perfectly cooked every time, with a rich, caramelized flavor.
How to Tell When Roasted Garlic is Ready
Knowing when your roasted garlic is done is crucial to avoid overcooking or undercooking it. Here are the key signs to look for:
-
Softness: Gently press on the garlic bulb. It should feel soft and squishy, a sign that the cloves inside have softened and caramelized.
-
Golden Brown Color: The garlic cloves will take on a rich golden-brown color, indicating that they’ve developed their full flavor.
-
Aromatic Smell: The smell of roasted garlic will fill your kitchen, signaling that it’s time to take it out of the oven.
If your garlic is not yet soft or lacks color, continue roasting for a few more minutes. Just be careful not to leave it in too long, as it can burn and become bitter.
How to Use Roasted Garlic in Various Recipes
Once you’ve mastered roasting garlic in a garlic roaster, you’ll find endless ways to use it in your cooking. Here are some delicious ideas to get you started:
1. Roasted Garlic Bread
Mash roasted garlic and mix it with softened butter. Spread it on a loaf of bread and bake until golden. The sweet garlic flavor will infuse the bread, making for a tasty side dish or appetizer.
2. Roasted Garlic Pasta
Stir mashed roasted garlic into your favorite pasta sauce. The garlic will add a deep, sweet flavor that complements the tomato or cream-based sauces.
3. Roasted Garlic Butter
Mix roasted garlic with butter and fresh herbs to create a savory spread for bread, vegetables, or grilled meats.
4. Roasted Garlic Mashed Potatoes
Add roasted garlic to mashed potatoes for a unique twist on a classic side dish. The garlic enhances the creaminess and adds a savory richness. By roasting garlic in a garlic roaster, you create a versatile ingredient that can elevate your meals in countless ways.
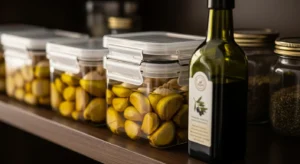
Storing Roasted Garlic
If you’ve roasted more garlic than you need, don’t worry! Roasted garlic can be stored for later use.
Refrigeration:
-
Place the roasted garlic in an airtight container and store it in the fridge for up to a week. You can store the garlic with a bit of olive oil to keep it moist.
Freezing:
-
For longer storage, freeze roasted garlic. You can either freeze the whole bulbs or mash the garlic and freeze it in ice cube trays for easy portioning.
Storage Tips:
-
Always store roasted garlic in an airtight container to prevent it from drying out. If storing it in oil, ensure the garlic is fully covered to prevent bacterial growth.
Common Mistakes to Avoid When Roasting Garlic
Roasting garlic in a garlic roaster is easy, but there are a few common mistakes you should avoid:
1. Over-roasting
Over-roasting garlic can cause it to become dry and bitter. Keep an eye on the roasting time and check for softness and golden-brown color to ensure it’s done perfectly.
2. Using Old Garlic
Old garlic may not roast as well and can have a more pungent flavor. Always use fresh, firm garlic bulbs for the best results.
3. Not Adding Enough Oil
Olive oil not only helps with flavor but also keeps the garlic moist. Don’t skimp on the oil—use enough to coat the garlic cloves.
By avoiding these mistakes, you’ll ensure that every batch of roasted garlic turns out perfectly.
Health Benefits of Roasted Garlic
Roasting garlic doesn’t just make it taste better—it also enhances its health benefits. Roasted garlic is packed with antioxidants and compounds that can improve heart health, reduce inflammation, and boost your immune system.
Garlic contains allicin, which has been shown to have anti-inflammatory and antioxidant properties. Roasting garlic helps to preserve these compounds, allowing you to enjoy the benefits without the harsh taste of raw garlic.
FAQs
How long should garlic be roasted?
Garlic should be roasted for 30-40 minutes at 400°F. The garlic is done when it is soft, golden-brown, and aromatic.
Can you roast garlic without a garlic roaster?
Yes, you can roast garlic in foil or a baking dish, but a garlic roaster makes the process more efficient and ensures even cooking.
Can roasted garlic be frozen?
Yes, roasted garlic can be frozen for up to three months. Simply mash the garlic and freeze it in ice cube trays for easy portioning.
Conclusion:
Roasting garlic in a garlic roaster is a simple way to enhance the flavor of your dishes. It’s a technique that every home cook should know, as it can transform basic meals into something special. Whether you’re making garlic bread, pasta, or roasted garlic butter, this method is a great way to bring out the sweet, rich flavors of garlic. Experiment with different recipes and enjoy the versatility of this easy-to-make ingredient.
By following the steps outlined here, you’ll become a pro at roasting garlic in a garlic roaster and discover all the creative ways you can use it in your cooking.